Fermentation At Home: Safe DIY Ways To Support Gut Flora Naturally
Our gut microbiome – the vast community of microorganisms residing in our digestive system – plays an incredibly pivotal role in overall health, extending far beyond just digestion. It influences immunity, mental wellbeing, nutrient absorption, even chronic disease risk. In recent years, there’s been a surge of interest in actively supporting this internal ecosystem, and one of the most effective (and enjoyable!) ways to do so is through fermentation. For generations, cultures around the world have relied on fermented foods not just for preservation, but for their inherent health benefits. Now, with a little knowledge and patience, you can easily incorporate these probiotic-rich powerhouses into your own diet by creating them in your very home kitchen.
The appeal of DIY fermentation isn’t merely about saving money or accessing unique flavors; it’s about regaining control over what we consume. Many commercially available “probiotic” products can be expensive and their efficacy varies greatly. Homemade ferments, on the other hand, offer a living culture teeming with diverse microbial strains tailored to your specific ingredients and environment – essentially crafting personalized probiotics. This article will guide you through safe and accessible methods for home fermentation, focusing on techniques that support gut flora naturally, while emphasizing safety best practices. We’ll explore foundational fermented foods and provide clear instructions for incorporating this ancient art into your modern lifestyle. To better understand the impact of diet on your digestive system, consider exploring low-cost ways to check gut status before a specialist visit.
The Foundations of Fermentation: Why It Works & What You Need
Fermentation is, at its core, a metabolic process where microorganisms – bacteria, yeasts, or molds – break down carbohydrates (sugars and starches) in an anaerobic environment (without oxygen). This creates various byproducts like lactic acid, alcohol, or acetic acid, which not only preserve the food but also contribute to unique flavors and textures. Think of the tangy crunch of sauerkraut, the bubbly effervescence of kombucha, or the complex umami of miso – all products of this fascinating process. The key is harnessing these beneficial microbial activities in a controlled way.
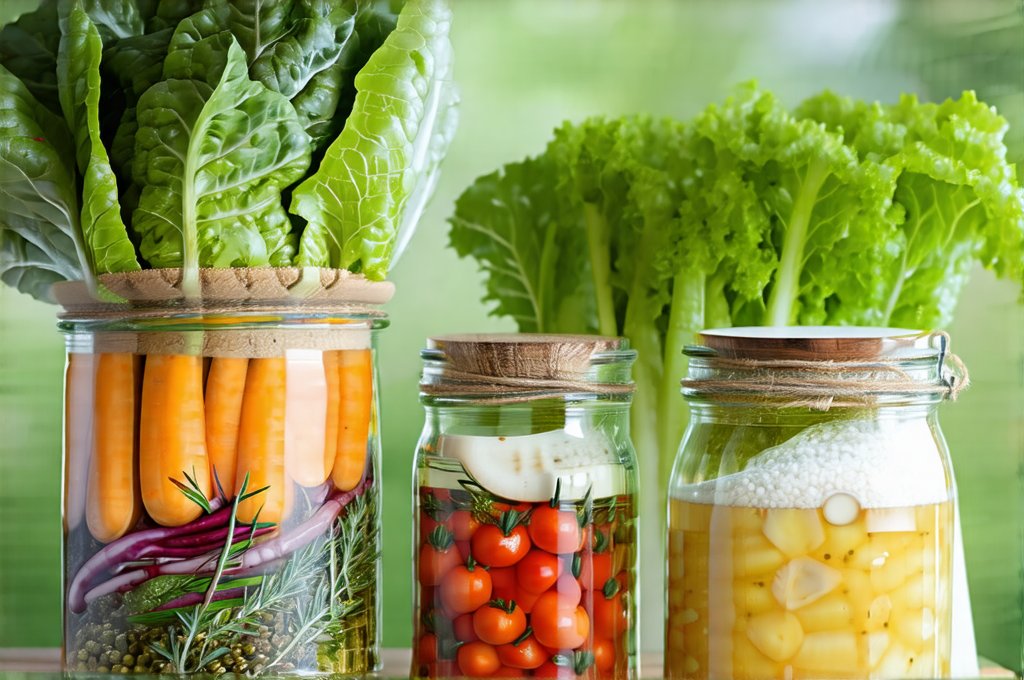
Successfully fermenting at home requires understanding some basic principles. Hygiene is paramount; clean equipment prevents unwanted microorganisms from taking hold and spoiling your batch. Using non-reactive materials like glass, ceramic, or food-grade plastic is also crucial – avoid metals which can interfere with the fermentation process. Finally, patience is a virtue! Fermentation takes time, allowing the microbial cultures to develop and transform your ingredients. Don’t rush it; let nature do its work. Essential equipment includes: jars (wide-mouth Mason jars are ideal), weights (glass pebbles or fermentation weights), airlocks (optional but helpful for certain ferments), and a clean workspace. A well-functioning digestive system is vital, so building a digestive routine can be incredibly beneficial.
Fermented foods offer a unique advantage over probiotic supplements because they contain live cultures alongside prebiotics – the food that feeds those cultures. This synergy creates a more robust and effective approach to gut health. Prebiotics, naturally present in many vegetables, provide sustenance for the probiotics, allowing them to thrive within your digestive system. This holistic benefit is difficult to replicate with isolated probiotic supplements alone. When you’re making fermented foods at home, you are also building an understanding of this process, and can adjust recipes and ingredients based on personal preferences and what works best for your gut. If you suspect food sensitivities might be hindering your progress, explore safe ways to test food tolerance after a period of dietary elimination.
Making Sauerkraut: A Beginner-Friendly Start
Sauerkraut – German for “sour cabbage” – is arguably the most accessible fermentation project for beginners. It requires minimal equipment and offers a satisfying introduction to the process. The core ingredient, cabbage, is readily available and relatively inexpensive. Here’s how you can make your own:
Finely shred one medium-sized head of cabbage (about 2 pounds).
Place the shredded cabbage in a large bowl and add about 2 tablespoons of non-iodized salt. Non-iodized salt is important because iodine can inhibit fermentation.
Massage the salt into the cabbage for 5-10 minutes, until it begins to release its liquid. This process draws out water necessary for fermentation.
Pack the salted cabbage tightly into a clean jar (a quart-sized Mason jar works well), pressing down firmly to submerge the cabbage in its own brine.
Use a weight (fermentation weight or a small glass jar filled with water) to keep the cabbage submerged below the liquid level. This is crucial for preventing mold growth.
Cover the jar loosely with a lid, or use an airlock if you have one. Allow to ferment at room temperature (around 65-75°F) for 1-4 weeks, tasting periodically to check on its sourness and texture.
The fermentation process will create bubbles as gases are released. Taste your sauerkraut after a week; it should be noticeably more tart. Continue fermenting until it reaches your desired level of acidity. Once fermented, store in the refrigerator to slow down the process. Remember to always discard any batches that show signs of mold or off-putting smells. Supporting gut transit is crucial for overall health, so consider naturally supporting gut transit and reduce pressure.
Kimchi: Beyond Cabbage – Korean Fermented Delight
Kimchi, a staple in Korean cuisine, is similar to sauerkraut but utilizes a wider range of vegetables and spices. While slightly more complex, it’s still incredibly achievable at home. The characteristic spice comes from gochugaru, a Korean chili powder, which not only adds flavor but also boasts antioxidant properties.
The process begins much like sauerkraut: shredding cabbage and salting it to draw out moisture. However, kimchi differentiates itself through the addition of ingredients such as daikon radish, carrots, scallions, garlic, ginger, and gochugaru paste. A rice flour porridge is often used as a binding agent and provides additional carbohydrates for fermentation. After mixing all the ingredients thoroughly, the mixture is packed into jars and allowed to ferment for several days at room temperature before being refrigerated. The length of fermentation influences its flavor profile – shorter periods result in fresher, crisper kimchi, while longer periods create a more intensely fermented, sour taste.
Kombucha: A Bubbly Probiotic Beverage
Kombucha is a fermented tea drink that has gained immense popularity for its refreshing flavor and purported health benefits. It’s made by fermenting sweetened tea with a SCOBY (Symbiotic Culture of Bacteria and Yeast), which looks like a rubbery pancake. The SCOBY consumes the sugar in the tea, producing various acids, carbon dioxide (creating the fizz), and probiotics.
Making kombucha requires careful attention to hygiene to prevent mold contamination. Begin by brewing sweetened black or green tea. Once cooled, pour it into a clean glass jar and add your SCOBY along with about a cup of starter liquid from a previous batch (this provides a beneficial microbial environment). Cover the jar with breathable fabric secured with a rubber band. Allow to ferment at room temperature for 7-30 days, tasting periodically. The fermentation time influences its sweetness and tartness – shorter times yield sweeter kombucha, while longer times create more acidic varieties. After reaching your desired flavor, bottle the kombucha and refrigerate to halt fermentation. You can even add fruits or herbs during a second fermentation stage for enhanced flavors. If you’re interested in understanding how diet impacts liver health, look into supporting liver regeneration naturally at home.
The key takeaway is that home fermentation isn’t about perfection; it’s about experimentation and learning. Each batch will be unique, influenced by your ingredients, environment, and personal preferences. Embrace the process, prioritize safety, and enjoy the delicious rewards of crafting your own probiotic-rich foods! Additionally, consider how you can use warm liquids to support gut health.
Dr. Jonathan Reyes is a board-certified gastroenterologist with over 15 years of clinical and academic experience. With dual degrees in medicine and microbiology, he specializes in the gut microbiome and its systemic influence on immunity, metabolism, and mental health. He has contributed to multiple international studies on probiotics and teaches at a leading medical university in California. His passion lies in helping patients and readers understand the invisible ecosystem within them — and how to nourish it for lifelong health.